Showing posts with label Lori Smith. Show all posts

Thursday, 6 April 2017

Kicking goals

Slowly, slowly I feel like I am reaching my goals for this week.

"Time For Love" wedding quilt

"Time For Love" wedding quilt is bound. It needs a label, and I need to check over it for threads to be trimmed. Then I can post it to the gorgeous couple!

A little bit closer

I need to take some closeup photos of the blocks to share.

Secret Garden block 2 is almost finished. The flamingo legs and head feathers are stitched on (it still needs an eye). Most of the stripebell stems are stitched on. The only thing left now is a few stripebell stems and the flamingo eye, and to replace the large pink leaves, then attach the last stripebell. (If I hadn't been tea total for 6 1/2 years, I'd have a few drinks to celebrate that last stripebell). Secret Garden is a wonderful mystery applique BOM, and I am so grateful to be stitching along with 5,000 other people on Esther's facebook group page. I need the motivation to finish one block, and start another.

I've spent an hour drooling over fabric for Secret Garden block 3. I've picked a lot of the fabrics, and thinking about adding other colours and dimensions with fabric paint or embroidery stitches. Instead of hiding the cat behind flowers, I think I will turn the head upside down, and "disappear" the body, adding a toothy Cheshire Cat grin.

More leaves are prepared and basted onto Diamond Hill block 3. I am not even going to start stitching it yet. I'm not in the mood at the moment. I am happy to keep up preparing those blocks on time at the moment. I guess when it gets closer to piecing everything together in 3 1/2 months I will feel very inspired to stitch the pieces down.

Next post should be much more photo heavy.

Linking up with Esther's WIPs on Wednesday.

Friday, 9 December 2016

Tutorial: How to accurately trim an applique or stitchery block to an unusual size

I've been using my own technique - The Lorraine Lowe technique - for trimming applique and stitchery blocks for years now. It probably goes back to my first time using Lori Smith's quilt patterns as they often end up at odd sizes such as 7 7/8 inch finished blocks.

What do you do when nobody makes a square ruler in the right size?

For this tutorial I will show how I trimmed down oversized applique blocks  (There always appears to be a bit of shrinkage in background fabric during the applique or stitchery. It is wise to start with a bigger piece of background fabric, then trim the block after stitching).

My blocks are from a Lori Smith pattern, with a 13 3/4 inch finished block. This means I need to cut them 1/4 bigger along each edge.

First I have some template plastic with a quarter inch grid on it. I usually like to buy one big piece, then cut it to the finished size of the block, but I am living in a smallish quilting community and this is what I could get.

First I used paper scissors to trim away the clear edges without grid, and sticky taped the pieces together.

Be careful. Sometimes the grid won't line up exactly. It seems to be square in one direction, but not the other

I had to measure with the laser cut yellow ruler, then trim away about 1/8 inch along one edge of the plastic. Now it is square, and it is the finished size of my applique block after piecing in the quilt.


Next I write the size on the plastic with a permanent texta.

Then I mark the centre of the plastic with a permanent texta.

Keep your sticky tape handy. Press the back of the applique block then place it on your cutting mat with the design facing up.

Position the template plastic square using your centre marking AND ALSO looking at how much applique is near each edge. Try to ensure there is a pleasing amount of space around the applique. This is why the grid plastic is helpful.

Sometimes you need to make a choice when placing your template plastic. The  design may be too close to the edge, and you need to choose what to cut off and what to go around. Whatever is covered by the plastic is what will show up in your finished block.

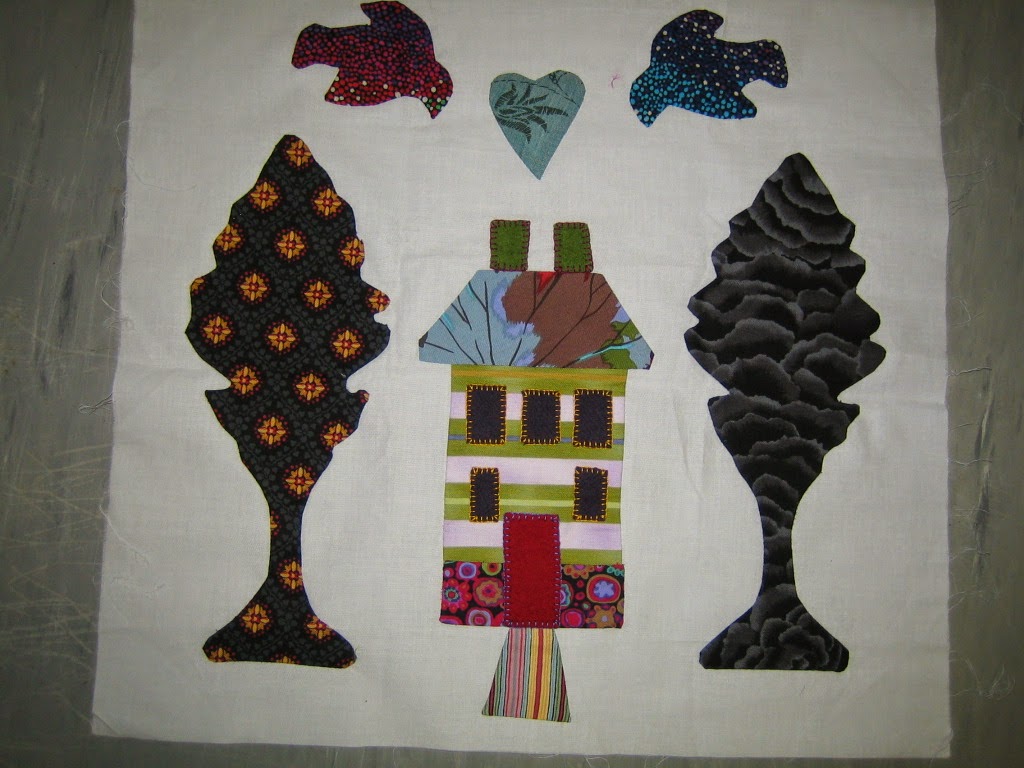
In this block I chose to cut off the bottom of the trees rather than to cut the birds wings.

The template plastic square may need to be placed slightly diagonal, which makes the edges off-grain, and more likely to stretch (be careful!). I choose to keep them as square as possible, but with this particular quilt I was adding sashing, so the block should stay pretty square if I pin each edge very precisely.

When you are happy with the placement, use sticky tape to hold the template plastic onto your applique block.

With your ruler, line up the grid with the ruler lines, allowing the ruler to overhang the template plastic by 1/4 inch. There should be no possible way your rotary cutter can cut the plastic. The cut will be made 1/4 inch away from the template plastic. Cut one side with the rotary cutter. 

Try to leave the block on the cutting mat without picking it up to turn it (I like to cut mine on an island bench). If you do need to lift the block to turn it to cut the next side, lift it gently while supporting the plastic and block together.  Cut each side 1/4 inch away from the template plastic using the ruler to measure.

Lift the template plastic square off the block. The sticky tape will stay attached to the plastic.

Press another block, position the template plastic where it is pleasing, and trim each edge, adding 1/4 inch on each side.

I usually trim my blocks down when I am just about to stitch them into a quilt, so that the freshly cut edges are not handled a lot, and are less likely to stretch if they are slightly off grain.

In this block it was more important to have the petals of the flower an equal distance from the edges of the block, than to have the centre in the exact middle (it may be 1/4 inch skewed, but it is still pleasing to the eye).

In this symmetrical block, lining up the centre vertically was very important or it will look like the flower is leaning to one side.


Thank you for reading my tutorial using the Lorraine Lowe technique for trimming applique blocks accurately.

Please feel free to share the entire post without editing or sampling.

A bit of deliciousness

Ooh! What do we have in this bag?

It all started this morning when I met my best local quilty gf for coffee before she goes away over Christmas. I was gathering my show and tell, and came across some blocks I made some time ago. I guess I have been making them for a couple of years now. I started them in 2013 when I was living in a caravan and storage space was short.

 The applique blocks were prepared from Lori Smith patterns and Kaffe and friends fabrics in my stash, and they came along for the ride.


I was showing my cross-stitch progress to Su, and some more crocheted snowflakes (feeling a bit bored with those now), then out came the applique blocks. We counted how many were finished and thought about how they might be arranged. The Indian wedding is on today. I felt like making a quilt for the couple rather than giving one I'd already made. Bright colours are definitely their taste. Yes! I felt inspired! My sewing mojo is here!

So at lunch today, I drew on the back of a free calendar while sipping ice coffee. Here is a possible layout.


Fabric requirement calculations.

Right, now all I need is 20-30 minutes in the quilt shop. The fabrics I chose seemed to work.

Usually I prefer to make the centre of the quilt, then audition the next fabrics when the design radiates from the centre, but the quilt shop is 40 minutes away and it might close over Christmas JUST when I am keen to get my sewing thongs (not boots) on. I bought all the fabrics.

I've trimmed down the applique blocks, cut sashing and cornerstones.... and decided to write a tutorial on how to accurately centre and trim odd sized applique blocks. I have included it as a separate post.

Here are the trimmed blocks.


Tomorrow I get to pick up my fixed machine, Yay!! I can feel another "sewing retreat" weekend coming on!

Delicious fabric before it got the chop.


Sunday, 22 February 2015

Lost and Found

I've been rummaging in the "caravan stash" and found a few blocks I had finished and hadn't blogged... Gah! This is why I started the blog in the first place, to keep track of my projects. I am kicking myself for not keeping a record of when the blocks were finished. I do know these were finished before April 7 2014, as I have a photo on my phone from this time...


Looking back I see I haven't added them onto the blog anywhere yet. And so suddenly there are quite a few finished blocks in the Homage To American Quiltmakers series, and more that are ALMOST finished, but just need tweaking.... you know, some emphasis, or a little bit of stitching... and I am in the mood to stitch them.
I have this old game plan... I don't need to finish everything to start something new, but I do like to finish one thing... this way the number of UFOs never increases, but it never really diminishes either... 
How it works is I feel inspired to finish something as I am soo excited to start something new. I'm planning to start quite a few baby projects soon, with new arrivals in the family... very keen!


I just finished this house block this morning... and now there are 6 fully complete blocks.

 Oh! How I miss photoshop! I don't have it installed on my laptop, and the photos lack a certain zing and clarity....
Here are the 6 completed blocks, with more to come soon...

Friday, 20 February 2015

The Love Tree

And this is a block from the other pattern - "Hugs and Kisses From Mackenzie".


Why has this picture gone sideways? Please comment if you know how to help me fix this...

I plan to put my favourite blocks from the 2 quilt patterns into one quilt. I wonder how many blocks I will make!

After appliqueing the gentleman under the Love Tree, I didn't think he was quite as distinctive as he deserves. A little bit of embroidery outlining his figure, and an angelic glow for his lady have made all the difference.


I am so glad to be on broadband to access the blogs and become inspired by the work of others once again. It really makes a difference to me, and that is one of the reasons why I started this blog to begin with - to inspire others as much as they inspire me.

With all this browsing I found a terrific page on the Moda Bakeshop Blog with the Best Recipes of 2014. I hope you enjoy drooling as much as I do.

Thursday, 19 February 2015

Tree of Life

It's been an ill household here with flu and spew in practise... we spent a lot of time in the last few days sleeping, resting on the couch and watching movies - enforced rest.


 ..
 I picked up my applique blocks and very excitedly I have finished one already.

More pics here to show close-ups of embroidery work added.

This block is from the Lori Smith pattern "Flowers For Mackenzie". I am combining blocks from that quilt, and from "Hugs and Kisses From MacKenzie". I'm not really feeling like warm country colours, as it's so warm here all the time in North Queensland where I live now.


It's rainy season here - which means it's wet and the foliage is green and lush.

I'm using brights with Kaffe Fasset Collective fabrics, and some hand dyed felted wool. I adore this Tree of Life block.

Sunday, 5 January 2014

Vision board dream quilt

 I am just love, love, loving applique. I prepared these blocks to sew over 6 months ago, and I am working my way through them.

Living in a caravan, my internet access is limited to the portable hotspot on my phone, and it just EATS the internet credit.

Alas, I haven't been in blog world very much as a result.


 This is my dream and vision board quilt... I see myself with a loving man, in a home we have made beautiful together, surrounded by garden flowers and shrubbery.....

I set my intentions for all good things to come as I make this quilt and dream.....

This is another block from Homage To American Quilt Makers by Lori Smith.

Mostly Kaffe fabrics....


Tuesday, 31 May 2011

Satisfaction

I'm feeling quite satisfied with the bit-by-bit quilting of these mini quilts.


How good is it to finish 3 little quilts, then hang them all together??? Well, I can tell you. It IS good. *grin*


Especially after going through a dry spell (the blog has been a bit light-on hasn't it??). The quilt above is Delightful Four-patch - started November 2009, completed May 2010.


I'm rearing to sew at home, but the heater is on the fritz, and it's the coldest we can remember for June. So, if I am at home, I am in bed with the electric blanket and a beanie on, with a book. It's not quite right for the sewing machine... *grin*


Of course I'm also working on a mystery BOM for my LQS that I can't show my progress on... so that's another reason the blog looks a bit forlorn.


Still, I hope to keep you updated soon with another mini-quilt completed. (I do so love seeing these hang on the wall!!)...

Thursday, 2 September 2010

Now there are six.

This is the latest addition to my miniature quilt top collection.

Birds In The Air - made with 1800s reproduction fabrics. Measuring approx 16in x 20in. The yellow border is quite lairy, I think it will need a brown binding.


Now there are six little quilt tops waiting to be quilted. I said it before, and I will say it again. I plan to finish all the nine little quilt tops, then work out backings and bindings from the leftover bits of 45 fat quarters.... It's a self-challenge thing.
Sunday, 15 August 2010

Lonely stars

These little sawtooth stars looked lonely when I took this photo.So I took another photo with some of their friends from Lizzie Mae's Medallion...

The blocks won't actually be arranged like this. Gee, I like the way the stars look when slightly twisted off-centre. Hmm, that gives me an idea for a quilt. Yes, another idea for another quilt. LOL!!